
Creating a ZX Spectrum Image Load Video


In this post, I divert from my usual .NET posts and have a bit of retro fun showing how I recreated a ZX Spectrum loading screen for my Source Generation Game talk
Background
Back in October 2021, I presented a new talk at DDD East Midlands about my journey with source code generators leading up to the introduction of .NET source code generators being introduced with .NET 5.
In the months since then, I have refined the talk to introduce the enhancements in .NET 6 and also the potential dangers of using generators found on NuGet (as highlighted in my blog post Could .NET Source Generator Attacks Be A Danger To Your Code?).
The talk starts with the ZX Spectrum, my first computer where I wrote my first code generator and moves through the VB years and then onto .NET with the many different ways that we have used various tools and libraries to generate code.
The name of the talk "Steve Collins and the [Source Code] Generation Game" is a play on the name of a popular BBC TV show 'The Generation Game' that ran from the early 1970s that continued on and off into the early 2000s.
I thought it would be a bit of fun to have a logo for the opening slide that would be heavily influenced by one of the logos used by the TV programme in its opening titles. The one that I felt was suitably "retro" was from the title sequence in this video
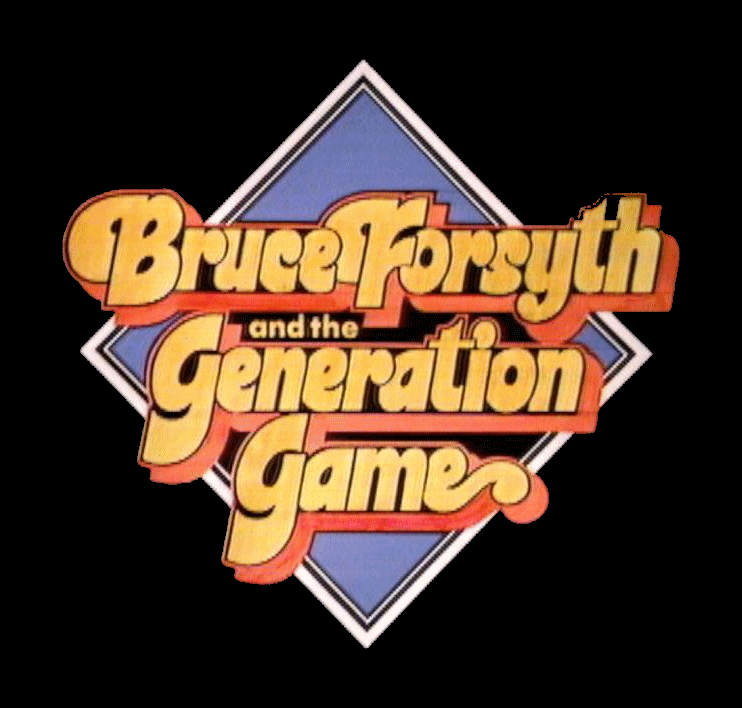

Whilst I could not find a matching font, I think that the final result captured the feel of the original but with a slightly more '80s vibe than the original early '70s one.
"Speccyfying" The Image
In preparing for the talk's latest outing at DDD South West, and given that the start of the talk is about writing a source code generator on the ZX Spectrum, I thought that it might be fun to emulate the logo loading on a Spectrum, the results can be seen here.
Some people have expressed an interest in how I created this, so I have written this blog as a step by step guide.
Step 1 - Converting The Image
The first step is to convert the image into a ZX Spectrum image format.
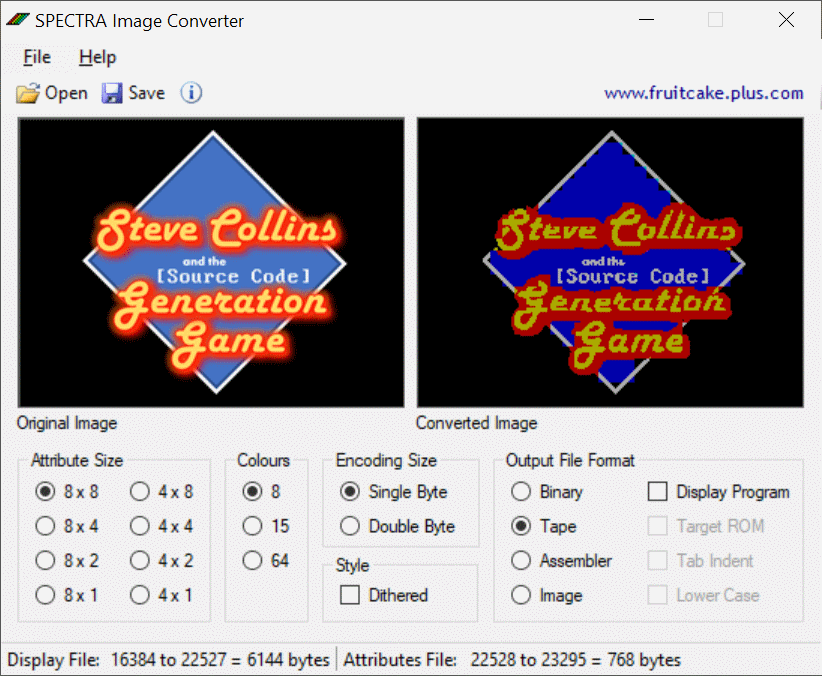
To do this, I used the Spectra Image Converter.
This application can take images in various formats and do the appropriate conversion. Whilst it supports many output resolutions, for the true original 48K Spectrum experience with colour-clash, I set it up using the following settings
- Attribute Size : 8 x 8
- Colours : 8 (though you may want to experiment with 15 to include 'Bright' colours)
- Encoding Size : Single Byte
- Output File Format : Tape
In the Spectra application there is an option to create a 'Display Program' but this does not achive what I was expecting (as it loads the image into memory at address 32768, not the screen address of 16384), so I have left this option unchecked in the user interface.
(For a detailed explanation of the ZX Spectrum pixel and attribute layout, there is a great explanation at David Black's Overtaken by Events site.)
You may want to refine your original image and play around with this until you get a final image that you are happy with.
Once you have the image ready, it is time to save the output as a TAP file.
Step 2 - Prepare the Fuse Emulator
With a TAP file ready, the next step is to load the image using a ZX Spectrum emulator.
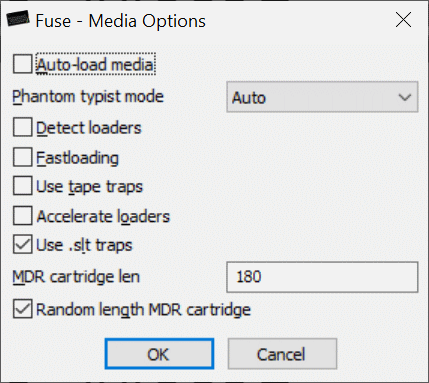
Various emulators are available, but the one that I have been using is the Fuse Emulator.
The Fuse emulator supports options for fast loading from a virtual tape, but for what we want to achive, we want to turn these options off, as shown in the screen below (Accessed via the menus: Options > Media)
Step 3 - Write the Loader Program
With this done, we need to write a short program to load the image into the screen memory.
Have created a TAP file of this program that can be loaded into FUSE on GitHub
In the program shown above, I have used a white background and 'paper' (colour 7) with black 'ink' (colour 0) before the screen starts loading and the set a black border a the end. Depending on the palette of your image you may want to use different colours and the BRIGHT command to suit your needs.
Step 4 - Run the Loader Program
With the program entered (or loaded from the TAP file), we can now get ready to record the loader. To do this, I used Camtasia to record the FUSE screen.
In FUSE, use the Media menu to navigate to the Tape option, them the Open option (or press F7) to select the TAP file that you saved from Spectra.
The enter the RUN command on the Spectrum being emulated.
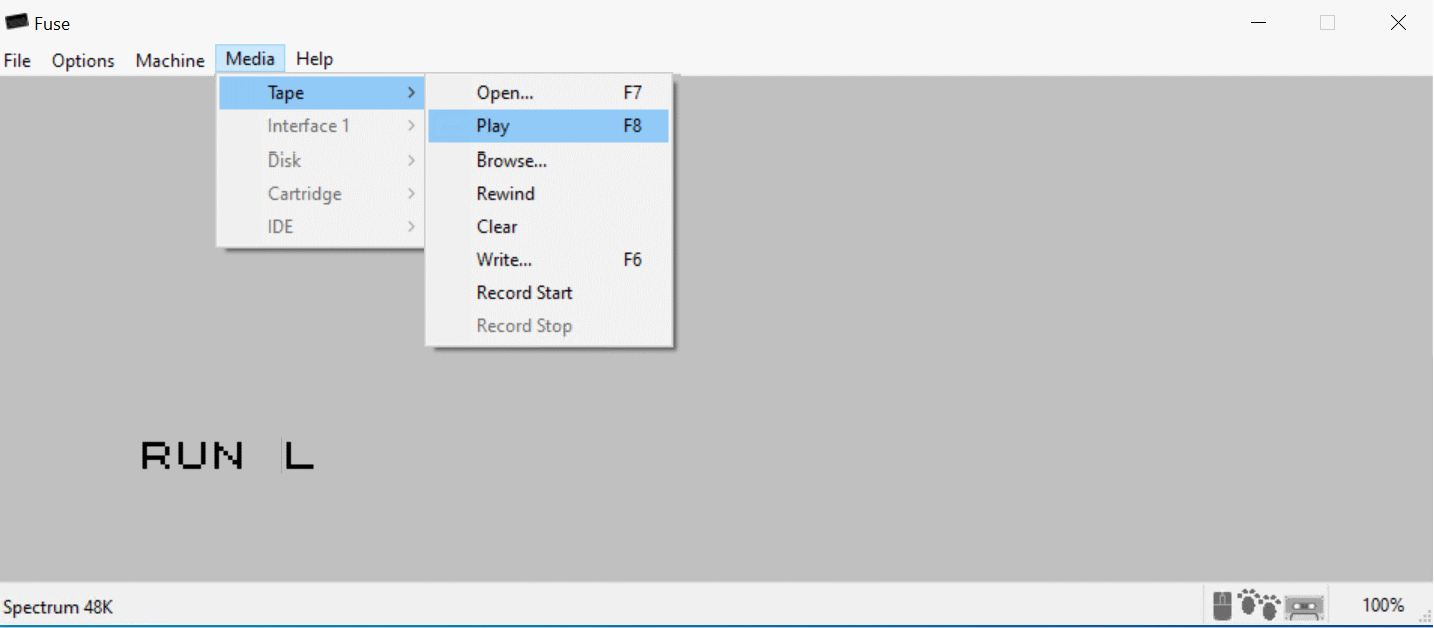
This will not actually do anything yet as it is waiting for you to press PLAY on the virtual tape deck.
If you have not already started your screen recorder to capture the FUSE screen, do so now
To play the virtual tape, go back to the Tape option on the Media menu and click on Play (or press F8 if you do not want to have to edit the menu selections from your screen recording).
At this point, assuming you have set the Media options not to use fast loading, you will hear the unforgetable tones of the tape header followed by the squeek of data to show the program name you save the image as. This is then followed by the image loading one line at a time and finally the colour attributes at the end.
Have a Play!
If you have a hankering to re-live those long forgotton 8-bit days when loading screens were provided to relieve the boredom of waiting serveral minutes for a game to load, why not have a go at recreating your own loader screen. Hopefully the process I have described above will be of use to you.